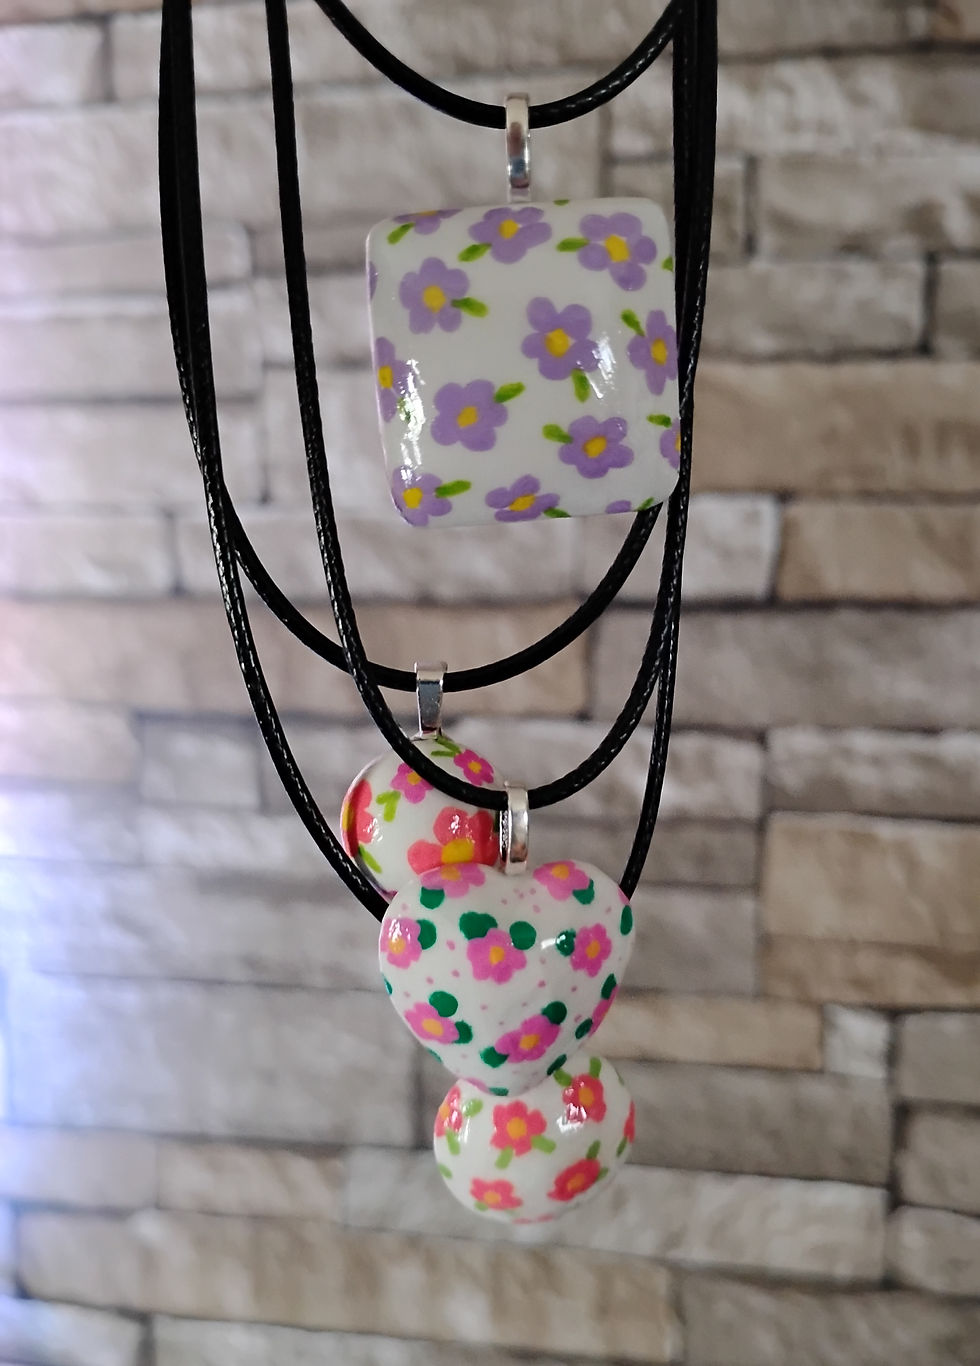
Plaster Pendants with Tiny Florals
- Melissa McKenzie

- Aug 2, 2025
- 3 min read

Whenever I spend a day pouring molds, I always have an odd amount of plaster left over because it's nearly impossible to estimate the exact amount I will need. I've learned to keep some tiny mold nearby to pour the extra. Usually, I use little flower molds and turn them into fridge magnets, but I found this little jewelry pendant mold and decided it was suitable for my leftover plaster on this particular occasion.

When I first demolded my shapes, I wasn't sure what I wanted to do with them. They sat around in my "To Paint" bin for over two weeks before I decided to try painting on them. Because the shapes are small, I grabbed my Grabie Fine Acrylic Markers hoping I'd come up with something if I just started painting.

I wasn't worried about messing anything up. These pieces were just made from extra plaster that I didn't really have any plans for. If some didn't turn out, that would be okay.
I originally started with a little vine pattern, then a swirl, a large flower, and something that ended up looking an awful lot like an Easter egg. I hated them all. Then I thought back to a few weeks ago when I painted little florals on my nails. I wondered what little florals would look like on these blank canvases. So, I started painting little flower shapes. I tried different color combos and quickly realized I preferred darker petals with yellow centers and so I painted several pendants with similar but slightly different patterns.

The pendants were definitely tricky to paint due to their small sizes. I had to be extra careful not to touch freshly painted areas.
Once they were painted, I sealed them with two layers of Triple Thick. I debated on painting the backs with gold, but the gold paint wouldn't stick where some of the sealant had gotten smeared on the backs, so I decided to omit that idea this time. Next time, I will make sure I paint the backs gold first. I think it would just add a little extra charm and professional finish to the pendants.

I carefully glued some jewelry bails to the backs of my pendants. I did have a mishap where I had gotten a bit of glue on my finger and touched the front of the pendant and a small spot peeled off, sealant and all. I was going to toss it away but decided to try to repaint the area and re-seal it and it actually turned out just fine.
Once the pendants were fully dried, I attached them to corded necklaces.

I actually really love how cute and sweet these pendants turned out and would like to try making some more. I learned a few things this round that I can apply to my next try to make more elevated and professional looking pendants.

What do you think of these tiny Floral Painted Pendants? How would you paint these little blank shapes and make them your own?

If you enjoyed this inspirational craft post, please consider subscribing to our newsletter to stay up to date on new posts and content.


I love the purple flowered one!! How can I get one?